
Water Damage Pack-Out: What Happens Step by Step
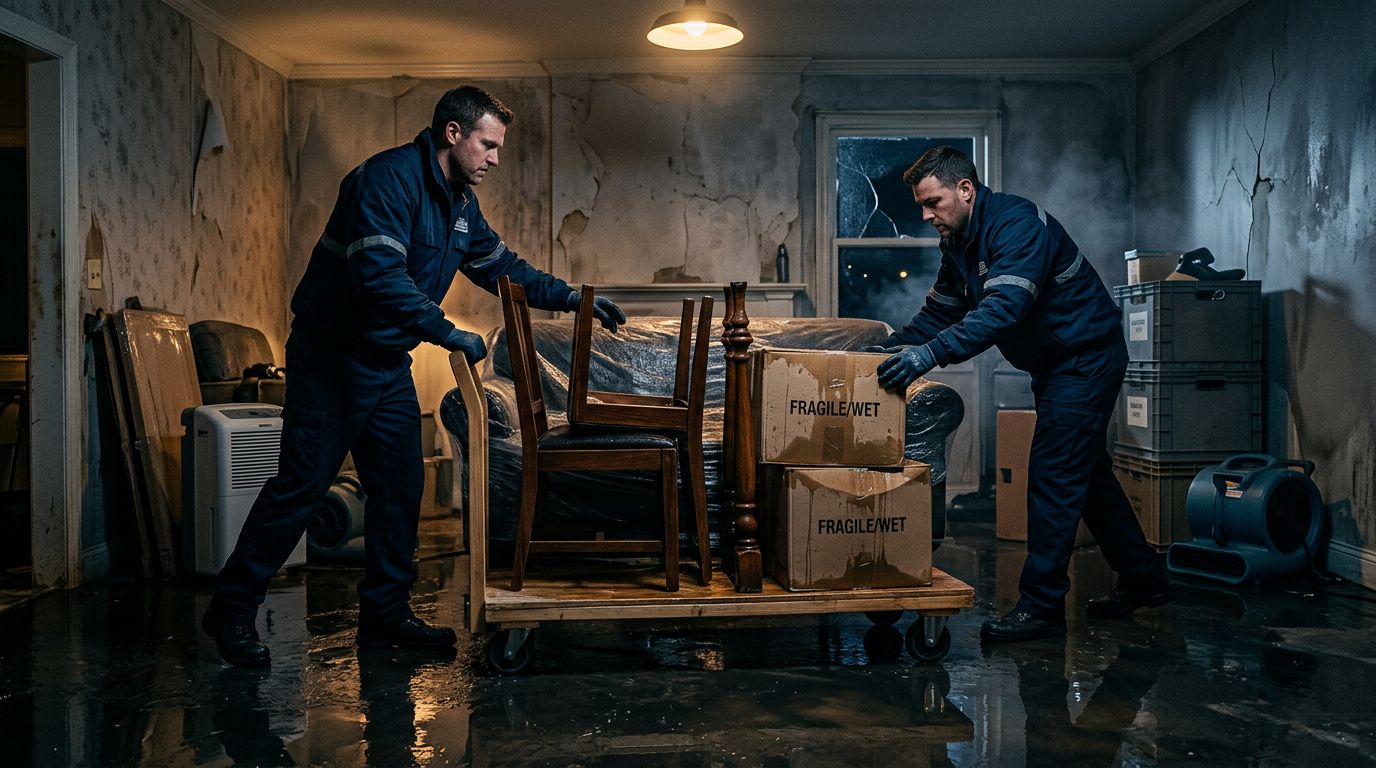
Water can damage more than floors, walls, and ceilings. It can soak furniture, stain fabrics, warp wood, and leave personal belongings exposed to mold growth or contamination. A water damage pack-out moves affected contents to a safe location while restoration professionals dry and repair the property.
The process can feel overwhelming, especially when someone is handling items with financial or sentimental value. Knowing what happens during packing, inventory, cleaning, storage, and return can help you protect your belongings and make informed decisions.
Key Takeaways
- A pack-out removes contents from affected rooms so crews can access hidden moisture and complete repairs.
- Restoration professionals should photograph, label, inventory, and track each item before moving it.
- Furniture, hard goods, clothing, and some electronics may be restorable, depending on the water source and condition.
- Porous, contaminated, or severely damaged items may need disposal after professional assessment.
- Keep your own photos, receipts, and inventory notes, and review the work scope before signing.
Why a Water Damage Pack-Out May Be Necessary
A restoration crew may recommend a full pack-out when water has affected several rooms or when contents block access to damaged areas. In other situations, a partial pack-out may be enough. For example, workers might remove only the furniture and boxes from one bedroom while leaving unaffected rooms in place.
Moving contents helps the crew reach wet drywall, flooring, cabinets, closets, and baseboards. It also reduces the chance of further damage while air movers, dehumidifiers, extraction equipment, and repair materials are in use. In humid areas such as Cape Coral and Fort Myers, drying can take longer when furniture sits against damp walls or covers wet flooring.
The water source matters. A supply-line leak involving clean water may allow more belongings to be cleaned and restored. Gray water from an appliance, toilet overflow, or drain problem carries more contamination. Sewage or floodwater can contain pathogens, and many porous contents may require disposal.
A contractor should inspect the affected area before recommending a pack-out. That inspection may include moisture readings, photographs, water-category information, and a review of the rooms that need access. A general overview of residential water damage causes and restoration work is available through this Fort Myers water damage resource.
The pack-out itself doesn’t repair the structure. It creates a safer, clearer work area so the team can complete extraction, drying, cleaning, demolition, and reconstruction.
What to Do Before the Restoration Crew Arrives
You don’t need to pack everything yourself. In fact, moving wet or contaminated contents without proper protection can spread damage or expose you to unsafe water. Still, a few steps can protect your property and improve the accuracy of the inventory.
First, take photographs and video of each affected room. Capture wide views, then photograph individual items, labels, serial numbers, visible damage, and valuable details. Keep the original files because timestamps can help establish when the damage occurred.
If it is safe, move small, unaffected valuables away from the work zone. Keep jewelry, passports, medications, financial records, firearms, and irreplaceable photographs with you. Don’t walk through standing water near outlets, appliances, or electrical panels.
Use this short preparation checklist:
- Photograph rooms and contents before anything moves.
- Write down the location of high-value or sentimental items.
- Gather receipts, appraisals, warranties, and ownership records.
- Tell the crew about fragile materials, antiques, artwork, and electronics.
- Keep children, pets, and unnecessary foot traffic away from the work area.
- Save every estimate, work authorization, receipt, and storage document.
Avoid throwing damaged items away before the restoration team documents them, unless they create an immediate health or safety hazard. If disposal is necessary, photograph the item from several angles and record what happened.
What Happens During the Pack-Out
A professional pack-out usually follows a documented sequence. The exact process varies with the property, water category, contents, and restoration plan.
1. The crew surveys the rooms
The team reviews the affected areas and identifies what must be removed. They may separate contents into several groups: items that can stay, items for cleaning, items for storage, and items that appear unsalvageable.
The crew should discuss the scope with you before work begins. Ask which rooms they plan to enter, whether they recommend a partial or full pack-out, and where the contents will go.
2. Workers document and inventory the contents
Each item should receive a description, location, and condition record. Crews may use barcode labels, spreadsheets, photographs, or specialized contents software. A useful inventory identifies more than “box of kitchen items.”
For example, a detailed entry might record the brand, type, color, quantity, visible condition, and assigned box number. High-value items should receive individual photographs and descriptions.
Review the inventory process before signing. Ask how the company will handle items that are already damaged, missing components, or too fragile to move.
3. Contents are packed by room and category
Workers use appropriate packing materials for the item. Clothing may go into wardrobe boxes, dishes need dividers and padding, and books require careful handling because moisture can make them heavy and fragile. Furniture may receive plastic wrap, moving blankets, corner protection, or custom padding.
Items from each room should remain clearly identified. Labels may include the room name, box number, brief contents description, and handling instructions. Loose items should not disappear into an unlabeled box.
When contamination is present, the crew may use separate materials, protective equipment, containment barriers, and designated waste procedures. Contents exposed to sewage or heavily contaminated water should not travel through clean areas of the home without appropriate controls.
4. The crew photographs and secures the load
Before transport, workers may photograph packed boxes, wrapped furniture, and specialty items. They then load the contents into a company vehicle or move them to an on-site cleaning area, depending on the project.
Ask whether the contents will be cleaned before storage or stored first. The answer depends on the damage, available space, and restoration plan. Wet items often need attention before long-term storage because sealed moisture can increase staining, odor, corrosion, or mold risk.
5. Items go to storage or a cleaning facility
Contents may be stored in a warehouse, portable storage container, or another approved location. Some companies clean and deodorize items at their facility. Others use specialized vendors for rugs, artwork, electronics, furniture, or clothing.
You should receive storage information that explains where the contents are located, how access works, and how the company tracks removal and return. Keep copies of all documents related to transportation, cleaning, storage, and handling.
Which Belongings Can Be Restored?
The outcome depends on the water source, exposure time, material, temperature, contamination level, and speed of professional assessment. No restoration company can promise that every item will return to its original condition.
Hard, nonporous materials often have a better chance of cleaning. Examples include glass, sealed metal, some plastics, and finished surfaces. Solid wood furniture may be restorable when the damage is limited, although swelling, staining, veneer separation, and finish damage can complicate the work.
Textiles, upholstered furniture, mattresses, books, unfinished wood, and particleboard are more sensitive to moisture. Some may be cleaned and dried, while others may retain odor, staining, or structural damage.
Electronics require careful evaluation. Don’t plug in wet televisions, computers, appliances, or chargers. A qualified technician may inspect and test an item after it dries, but ordinary air-drying doesn’t remove every risk.
Items may require disposal when they have absorbed contaminated water, developed extensive mold, lost structural integrity, or cannot be cleaned safely. Insulation, some carpet padding, swollen particleboard, and heavily saturated porous materials often fall into this category. The decision should consider the item and the conditions, not only its appearance.
A clean-looking item can still hold moisture or contamination inside. Restoration decisions should follow inspection, documentation, and material testing when needed.
How Inventory, Insurance, and Storage Fit Together
A pack-out creates a record of what left the property. That record can support communication with your insurer, but it doesn’t decide what your policy covers. Coverage depends on the policy language, exclusions, deductibles, cause of loss, and any endorsements for contents, additional living expenses, or water backup.
Contact your insurance provider promptly and ask how it wants the damage documented. Some insurers may request photographs, estimates, receipts, proof of ownership, or an itemized contents list. Keep communication in writing when possible, and save the claim number with every document.
Compare the restoration company’s inventory with your own records. Check room names, quantities, model numbers, colors, condition notes, and special handling instructions. Report errors early, while the items are still tracked.
If you need help comparing local restoration providers, Angi’s Cape Coral remediation directory can provide a starting point for questions about experience and service categories. You should still verify the contractor’s license, insurance, references, written scope, and contents-handling procedures.
Storage costs and pack-out labor may appear as separate line items. Ask for an estimate that separates packing, transport, cleaning, storage, disposal, and return delivery. Also ask whether storage is billed weekly or monthly and whether the company charges for access requests.
What Happens After the Pack-Out?
Once contents are removed, the restoration team can work on the structure. Typical tasks include water extraction, moisture mapping, controlled drying, removal of damaged materials, cleaning, odor treatment, and repairs.
Technicians should monitor moisture in floors, walls, cabinets, and framing rather than relying on how surfaces feel. Drying records and readings can help show when the affected areas reached an acceptable condition for reconstruction.
After cleaning and repairs, the contents return to the property. The crew should place boxes and furniture in their original rooms when possible. Review the inventory during delivery and note missing, damaged, or incomplete items before the job closes.
Some projects require a separate contents specialist. This may apply to artwork, antiques, electronics, fine rugs, or documents. Ask who will perform the work and whether the company will coordinate with that specialist.
Conclusion
A water damage pack-out removes obstacles, protects contents during construction, and gives the restoration team access to wet areas that may be hidden behind furniture or stored items. The process should include careful documentation, room-by-room labeling, safe handling, and clear storage records.
Your best preparation is simple: photograph everything, secure irreplaceable valuables, keep your own inventory, and ask for a written scope before work begins. Restoration outcomes depend on the water and the materials, but accurate records and prompt professional assessment give your belongings the clearest path forward.
