
Ceiling Water Stains From Upstairs Plumbing in Cape Coral: What They Mean and What to Do Next
A brown ring on the ceiling can feel like a warning light on your car dashboard. It might be minor, or it might be telling you to stop and look under the hood.
In Cape Coral, ceiling water stains often come from an upstairs bathroom, kitchen, laundry, or HVAC drain line. Because our humidity stays high most of the year, a “small” leak can stay damp longer and cause bigger repairs later. The good news is you can usually narrow down the cause quickly, protect the area, and document everything before you bring in a licensed pro.
This guide covers likely sources, smart first steps, cost ranges (with caveats), and what to expect during leak detection and ceiling repair.
Why the stain shows up downstairs (and why it spreads sideways)
Water rarely drips straight down. It tends to follow framing, pipes, insulation, or drywall seams, then shows up where it finds a weak spot. That’s why the leak source might be a few feet away from the stain.
In homes and condos with an upstairs unit, the most common plumbing-related causes include:
- Toilet seal leaks: A worn wax ring or loose toilet can release water into the subfloor during flushes.
- Shower and tub leaks: Failed grout, cracked tile, worn caulk, or a leaky overflow gasket can let water escape slowly.
- Sink and supply line drips: Loose shutoff valves and braided supply lines can seep inside a vanity cabinet and run along the floor.
- Drain line issues: A small crack in a trap or drain fitting may only leak when the fixture is in use.
- Appliance hoses: Washing machines, dishwashers, and fridge water lines can fail without warning.
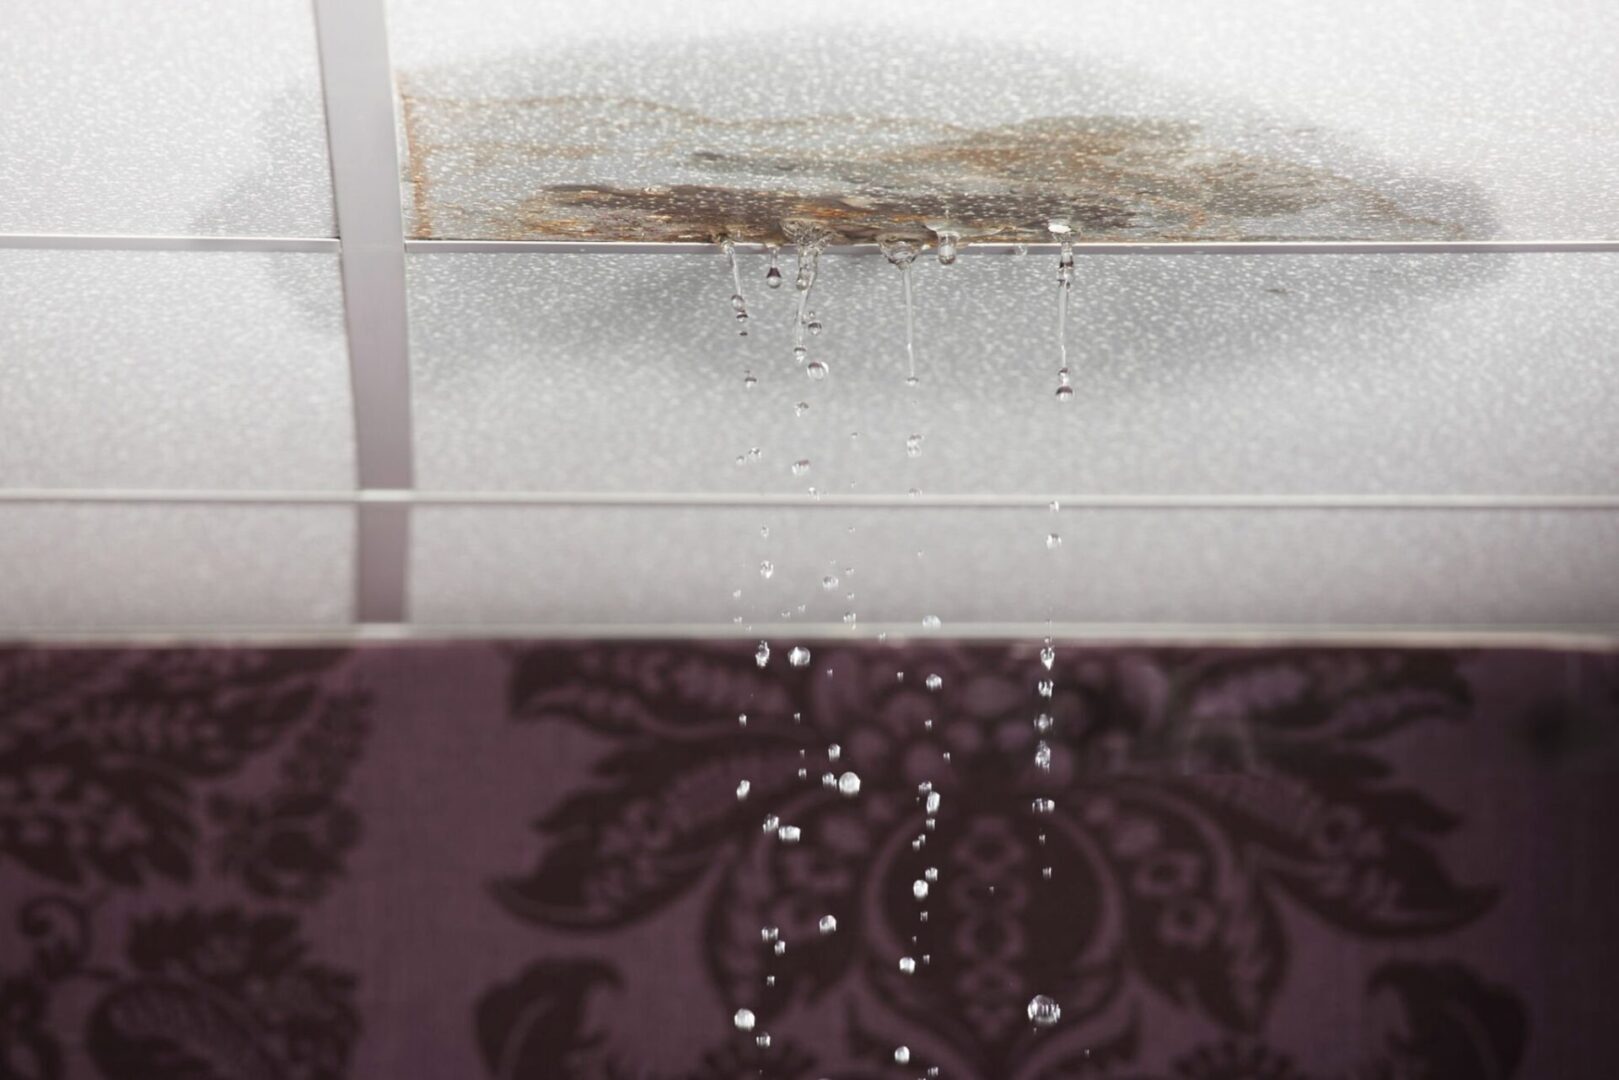
Color and texture can offer clues, but don’t treat it like a diagnosis. Fresh leaks often look yellowish to light brown. Older stains tend to darken, and you might see bubbling paint, soft drywall, or a slight sag.
A quick reality check helps: if the stain grows after showers or toilet use, plumbing is more likely. If it worsens after heavy rain, it could be roof or exterior intrusion, even if the stain sits under an upstairs room. For Florida-specific examples of recurring stains and non-plumbing causes, see common reasons ceiling stains return.
A stain is evidence of moisture, not proof of the source. The pattern matters, but timing matters more.
First steps that reduce damage (without making the mess worse)
Start with safety and containment. Even clean water can soak insulation, weaken drywall, and create conditions that mold likes.
If you see active dripping, place a bucket under the lowest point. Poke a small hole only if the drywall is bulging and you can’t get help soon, because a full “water bubble” can break and spread. When in doubt, wait for a pro.
Next, try to narrow the source with simple, low-risk checks:
- Pause upstairs water use for 30 to 60 minutes and watch the stain.
- Check obvious fixtures directly above: toilet base, shower curb, tub spout, vanity cabinet, and laundry connections.
- Look for “only when used” leaks: run the sink for two minutes, then stop and check below. Flush once, then check below.
For a practical overview of immediate actions when an upstairs bathroom is involved, compare your situation to what to do for an upstairs bathroom ceiling leak.
Quick Do/Don’t (Cape Coral edition)
- Do take date-stamped photos daily until it’s resolved, especially if you’re a tenant or manager.
- Do run the A/C as normal and set the thermostat to keep indoor humidity down.
- Do use a fan to move air in the room, but avoid blowing directly into a wet ceiling if it’s sagging.
- Don’t paint over stains yet. Primer hides color, not moisture.
- Don’t ignore a musty smell, even if the stain looks “dry.”
- Don’t cut large holes in the ceiling unless you’re trained and have verified power is safe.
In condos and rentals, notify the landlord or HOA right away. Keep communication in writing. Also ask who is responsible for the upstairs plumbing line, because ownership can change depending on the building rules.
What to expect from professional leak detection and ceiling repair (plus cost ranges)
Pros usually tackle this in two tracks: stop the leak, then repair the ceiling assembly (drywall, texture, paint). In Cape Coral’s humidity, drying and verification often matter as much as the patch itself.
A leak detection visit may include moisture mapping, thermal imaging, pressure checks, and targeted access points. Many companies aim for “non-invasive” methods first, then open small areas only where needed. Local pricing varies, but this overview of Cape Coral leak detection price ranges can help you set expectations before you schedule.
Once the source is addressed, drywall repair typically follows a sequence: remove compromised material, dry the cavity, treat or clean if needed, then patch, match texture, prime, and paint. If insulation is wet, replacement is common because it holds moisture.
Here are broad 2026 cost ranges homeowners in Florida often see. Your total depends on access, ceiling height, texture type, and how long the area stayed wet (and whether mold is present). Emergency service and after-hours calls can add fees.
| Service (typical scope) | Broad cost range (Florida, 2026) | What changes the price most |
|---|---|---|
| Leak detection only | $150 to $600 | How hidden the leak is, tools needed |
| Plumbing repair (fixture or pipe) | $150 to $850 (common) | Access behind walls, parts, labor time |
| Larger leak repair (hard access) | $500 to $4,700 | Slab or complex routing, demolition needs |
| Ceiling drywall patch and paint | $700 to $2,500 | Texture matching, paint blending, size |
| Wider ceiling restoration | $1,000 to $5,000 | Multiple rooms, insulation, drying time |
| Mold remediation (if needed) | $2,300 and up | Area size, containment, clearance steps |
Humidity is the wildcard. Materials dry slower in Southwest Florida, so a job can expand from a simple patch to a multi-day dry-out with monitoring. If you see spotting that looks like growth, or you smell a persistent musty odor, consider getting an inspection. This article on mold spots on ceilings and next steps explains why stains and microbial growth often trace back to the same moisture problem.
The fastest cosmetic fix is rarely the best fix. Stopping the water and drying fully helps prevent repeat stains.
If you’re working with insurance, keep every photo, invoice, and mitigation note. Also avoid throwing away damaged materials until you’ve confirmed what the adjuster needs.
Conclusion: treat the stain like a symptom, not the problem
Ceiling stains don’t usually start as disasters, they start as small, repeated moisture. In Cape Coral, that moisture can linger, especially in summer, so acting early pays off. Contain the water, document the damage, and bring in licensed help to find the real source before you repair drywall and paint.
If you manage property or you’re dealing with an upstairs neighbor, clear communication and good records protect everyone. When you’re ready, a local restoration and repair team like Services 321 can help you move from ceiling water stains to a clean, solid ceiling again.
Disclaimer: This article is general information, not professional advice. For diagnosis, safety decisions, and repairs, contact licensed plumbing, restoration, and mold professionals in Florida.