
Water Heater Leak Cleanup Steps Before Damage Spreads

A water heater leak can look small, until it soaks flooring, wicks into drywall, and leaves that musty smell behind. The good news is that water heater leak cleanup is often manageable if you act fast and stay safe.
This guide walks you through what to do in the first 15 minutes, the first hour, and the next 24 to 48 hours. You’ll also get decision points for common leak sources, tank vs. tankless units, and different floor types.
First 15 minutes: stop the danger, then stop the water
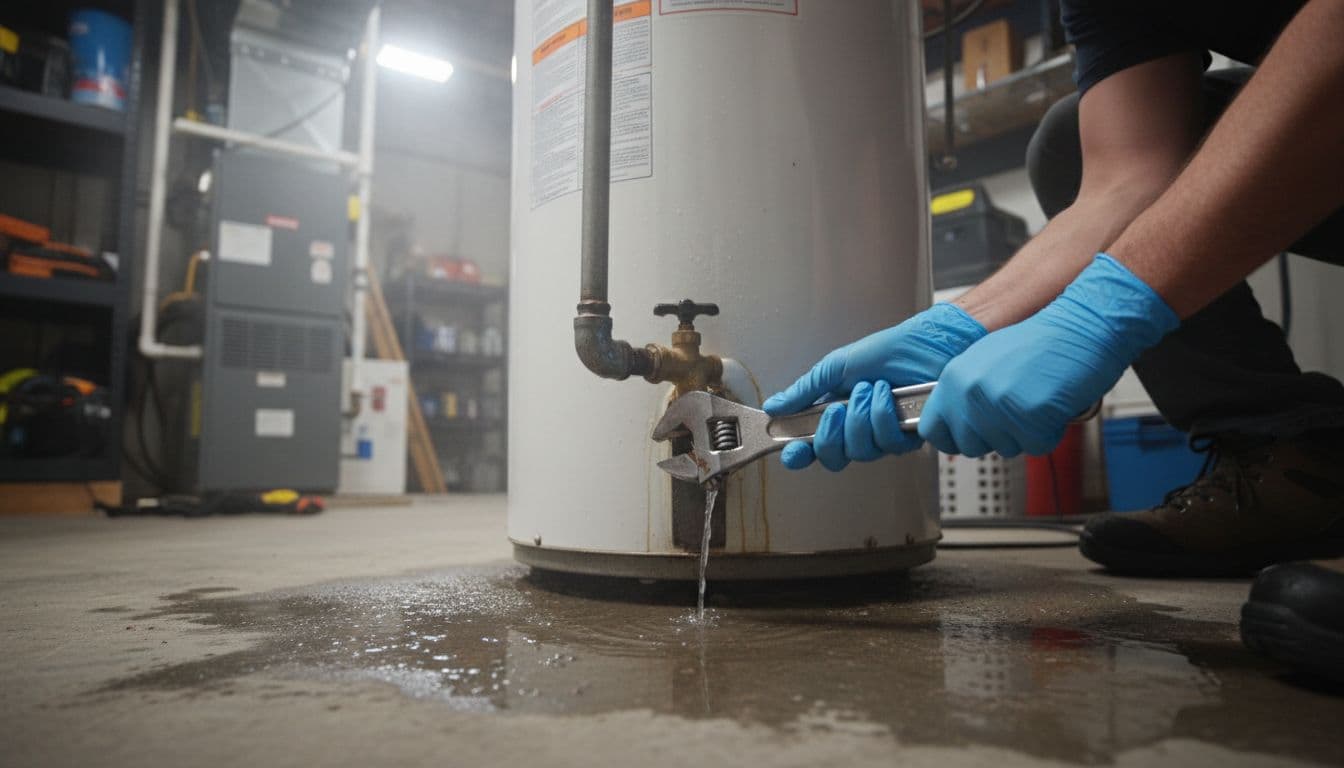
Before you grab towels, treat the area like a safety hazard. Water and electricity can turn a simple leak into an emergency. Hot water can also burn skin fast.
- Protect yourself first (Minute 0 to 2). Put on closed-toe shoes, gloves, and eye protection. Keep kids and pets out of the room.
- Check for immediate evacuate-and-call signs (Minute 0 to 2). If you smell gas, hear hissing near the gas line, see sparks, or the water is pouring near a breaker panel, leave the area and call 911 (and your gas utility if gas is involved).
- Cut electricity if water is near outlets (Minute 2 to 5). If you can reach the breaker safely on a dry path, turn off the water heater circuit. If the floor is wet near the panel, don’t approach it. Call a pro.
- Shut off the water supply to the heater (Minute 3 to 7). Turn the cold water shutoff valve to the right (clockwise). If the valve won’t move, don’t force it hard enough to break it.
- For gas units, stop heating (Minute 5 to 10). Turn the gas control to OFF. If you’re unsure, pause and call a plumber.
- Relieve pressure safely (Minute 10 to 15). Open a hot water faucet at a sink or tub. This helps slow dripping and reduces pressure.
If you’re not sure what’s safe around your setup, follow a conservative approach and use this type of water heater leak safety checklist as a quick reference while you wait for help.
First hour: water heater leak cleanup, tools, and floor protection
Now you’re working against time. Water spreads like spilled coffee on a paper towel. It travels under baseboards, into seams, and down to lower levels.
Start by gathering what you need, so you don’t keep walking through wet areas.
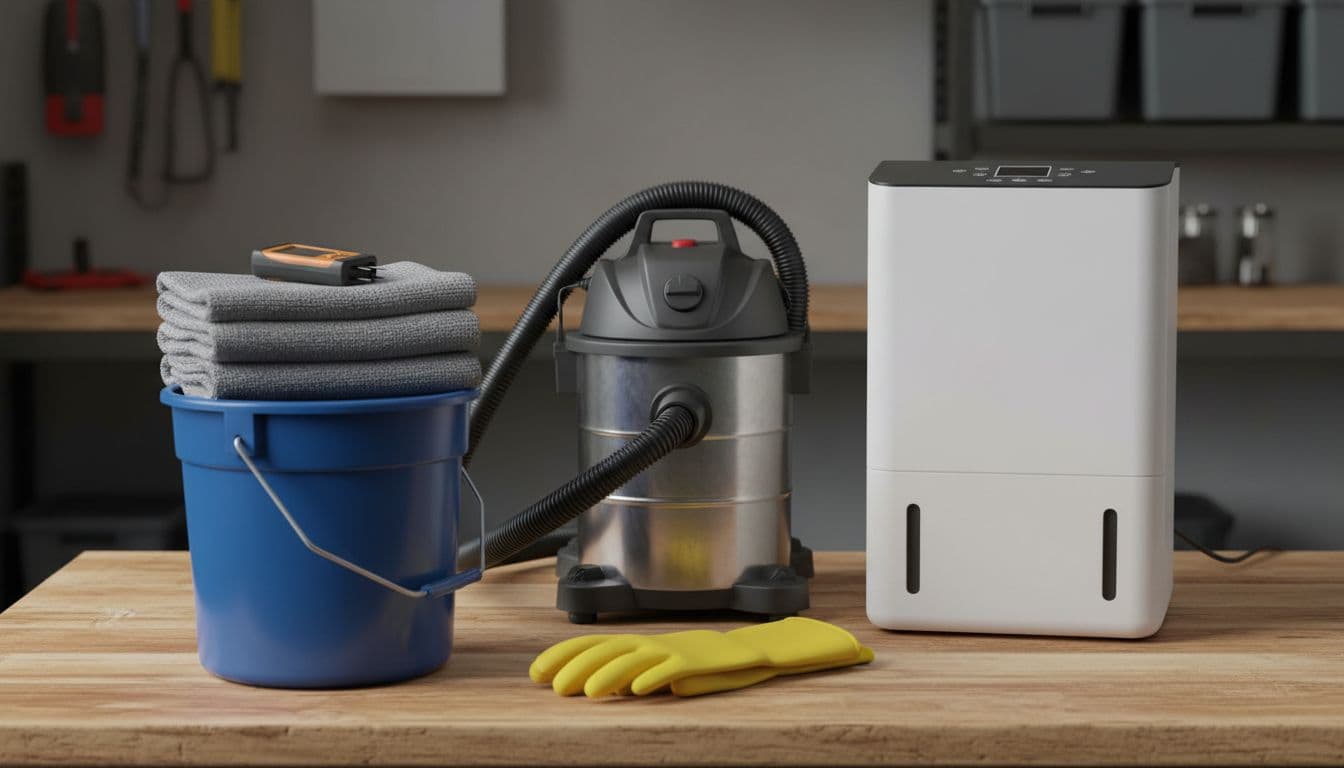
Tool and material checklist (grab what you have):
- Wet/dry vac (best for fast extraction)
- Towels and absorbent pads, plus a bucket
- Fans and a dehumidifier (even one helps in Florida humidity)
- PPE: gloves, eye protection, and an N95-style mask if things smell musty
- Moisture meter (optional) for checking walls and trim
For a deeper list of what helps, see these water damage cleanup tools and why they matter.
- Stop the spread (Minute 15 to 25). Use towels to create a “dam” at doorways. If the leak is near a wall, pull rugs back and keep water from pooling at baseboards.
- Extract standing water (Minute 20 to 40). Vacuum first, then towel-dry. If water is still dripping, put a pan under the leak and route it into a bucket.
- Match your next move to your flooring (Minute 30 to 60).
- Carpet holds water deep in the pad, so lift an edge and blot. If the pad is soaked, drying gets hard without pro gear.
- Laminate swells at seams, so remove surface water fast and don’t overheat it with high heat.
- Hardwood can cup, so dry gently but steadily with airflow.
- Tile handles water well, but water can still reach grout edges and baseboards.
Use this quick table to narrow down the leak source before you spend hours drying the wrong area:
| Where you see water | Likely source | What to do right now |
|---|---|---|
| Drips from top fittings | Supply lines or connections | Shut off water, dry, check for loose fittings, call plumber if still wet |
| Water from a side pipe | T&P valve discharge | Keep clear (scald risk), shut off heat, call plumber to diagnose pressure/temperature |
| Drip at bottom drain spigot | Drain valve | Tighten gently, place pan, plan valve replacement |
| Water pooling under tank base | Tank corrosion or rupture | Shut off water and power/gas, don’t run it, prepare for replacement |
| Tankless unit dripping | Inlet filter, fittings, or condensate line | Shut off water/power, check visible connections, schedule service |
For more on common leak spots like valves and connections, this guide on what to do when a water heater leaks is a helpful cross-check.
Next 24 to 48 hours: dry it out, verify, and know when to call pros
Drying is where many DIY cleanups fall short. Surfaces can look fine while moisture hides under trim or inside a wall cavity. That trapped dampness is what leads to odor, swelling, and mold.
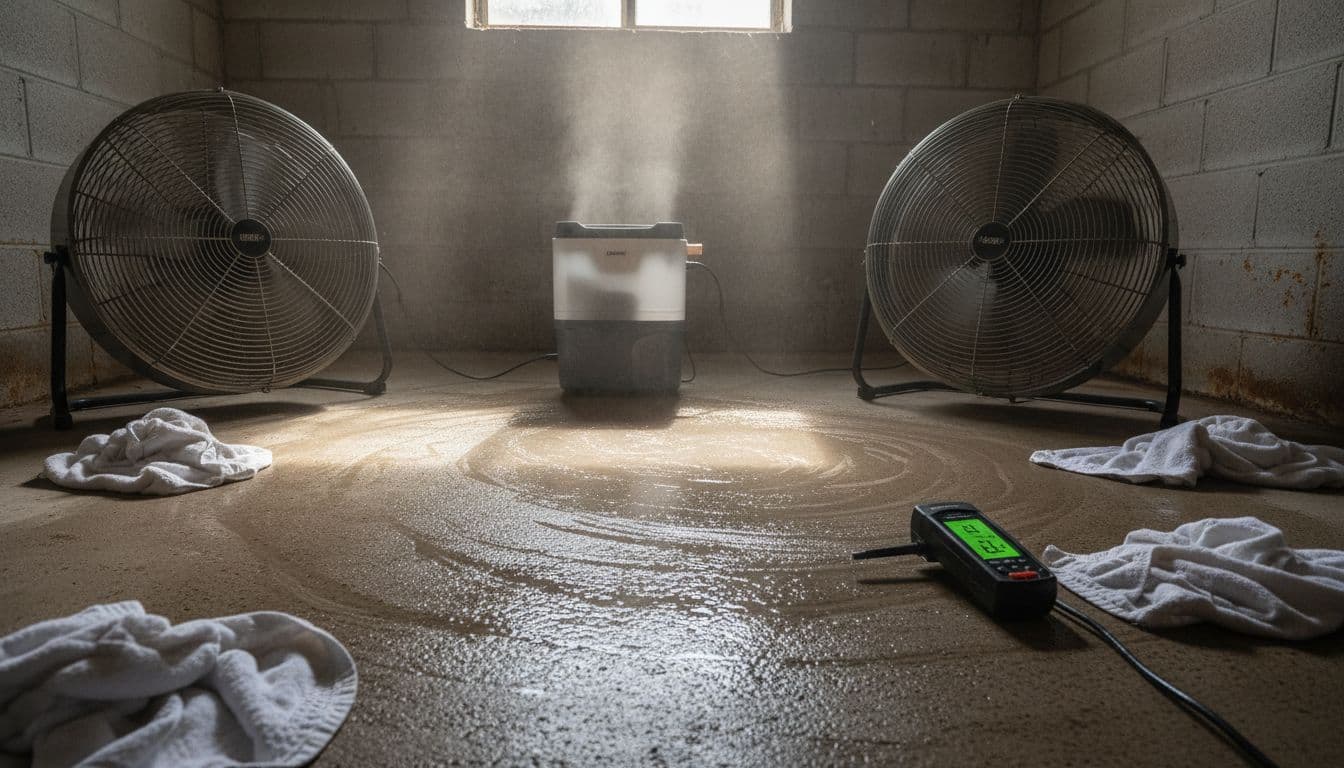
- Set airflow within the first 2 hours. Aim fans across the wet area, not straight down. Run a dehumidifier nearby with doors and windows mostly closed.
- Check walls and baseboards at 6 to 12 hours. Feel for cool, damp spots. Look for bubbling paint, swelling trim, or darkening along drywall edges.
- Re-check at 24 hours, then 48 hours. If you have a moisture meter, test the same spots each time. If you don’t, trust your senses and visuals. Musty odor, soft drywall, or recurring dampness means moisture is still present.
- Handle wet materials safely. Bag soaked carpet pad, warped laminate pieces, and crumbling drywall. Don’t store them indoors “to dry later.” They can seed mold.
- Document as you go. Take clear photos of the source area, wet rooms, and any items moved. Save receipts for fans, dehumidifier rental, and emergency supplies.
A good rule: if you can’t get it dry in 24 to 48 hours with basic equipment, hidden moisture is likely.
When it’s time to stop DIY and bring in help
Call a restoration pro or plumber promptly if any of the following are true:
- Water reached electrical outlets, a water heater wiring compartment, or the main panel area.
- Ceilings or walls are wet, especially if you have a room below the heater.
- The water is dirty (sediment-heavy, smells foul, or sat long enough to discolor).
- The wet area is larger than 10 to 20 square feet, or water went under flooring.
- A musty smell shows up or persists after 24 to 48 hours of drying.
Water can travel farther than you’d expect, especially under flooring and into adjacent rooms. This explanation of how far water spreads after a water heater leak helps set realistic expectations.
Conclusion
A leaking water heater is stressful, but fast action makes a real difference. Focus on safety first, then do water heater leak cleanup in phases: stop the source, extract water, and dry and verify over 24 to 48 hours. If moisture reaches electrical areas, walls, or large floor sections, it’s time to bring in a pro. If you’re in Cape Coral, Florida, Services 321 (Restoration 321) can help with drying, repairs, and insurance-friendly documentation so damage doesn’t keep spreading.