
When to Replace Cabinets After Kitchen Water Damage

A cabinet door can look normal after a leak while the box behind it is already failing. That is why water damaged cabinets fool so many homeowners.
If you had a dishwasher leak, pipe break, or slow sink drip, the real question is not “Do they still look okay?” It is whether the cabinet structure is still dry, solid, and safe. The line between repair and replacement starts there.
What water damaged cabinets can and can’t recover from
Start with the cabinet box, not the door. Doors and drawer fronts often survive better because they may be solid wood or better sealed. The box, toe kick, and bottom panel usually take the worst hit, especially under sinks and near the floor.
That matters because cabinet boxes carry the load. If the sides swell, the bottom sags, or the back panel pulls loose, the unit loses strength. In many kitchens, that means replacement is the safer choice.
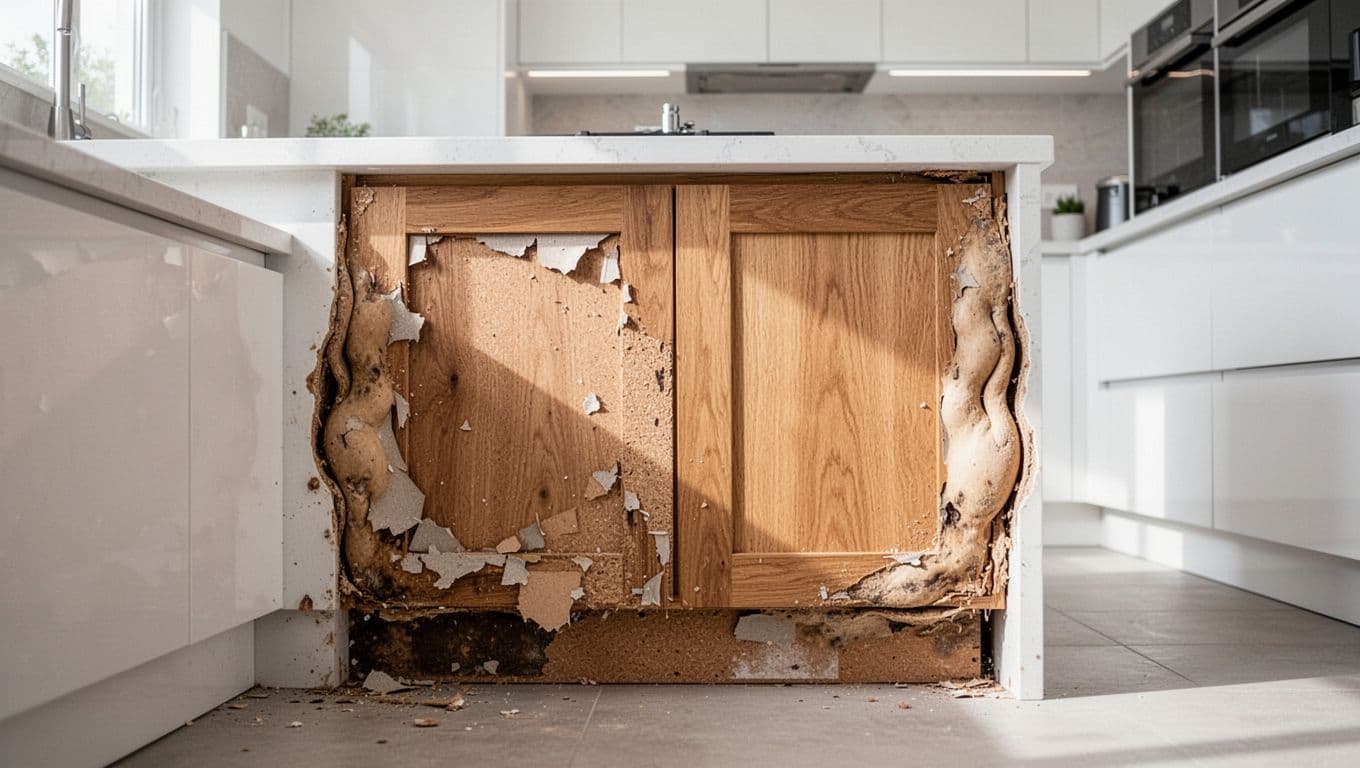
Material makes a big difference. Particleboard and MDF absorb water fast. After that, they puff up, crumble at the edges, and stop holding screws well. Plywood has a better chance if the leak was brief and the panels dried without warping. Still, once layers separate, repair rarely lasts.
A recent look at why cabinets can look fine after water damage points out a common problem: damage often stays hidden until hinges loosen, bottoms bow, or odors set in weeks later.
These signs usually point toward replacement:
- Swollen box sides, bottoms, or backs
- Delaminated veneer or peeling laminate on the box
- Soft, spongy, or crumbling particleboard or MDF
- Mold growth inside the box or behind the cabinet
- Sagging shelves, loose hinges, or screws that won’t tighten
If the box feels soft or the bottom sags, the cabinet has lost strength, not only finish.
Toe kicks are different. They often take splash damage first, and a single toe kick strip may be replaceable. Surrounding materials matter too. If drywall behind the cabinet is soft, or the subfloor has swelled, cabinet replacement alone may not solve the problem.
How to inspect cabinets safely after a leak or flood
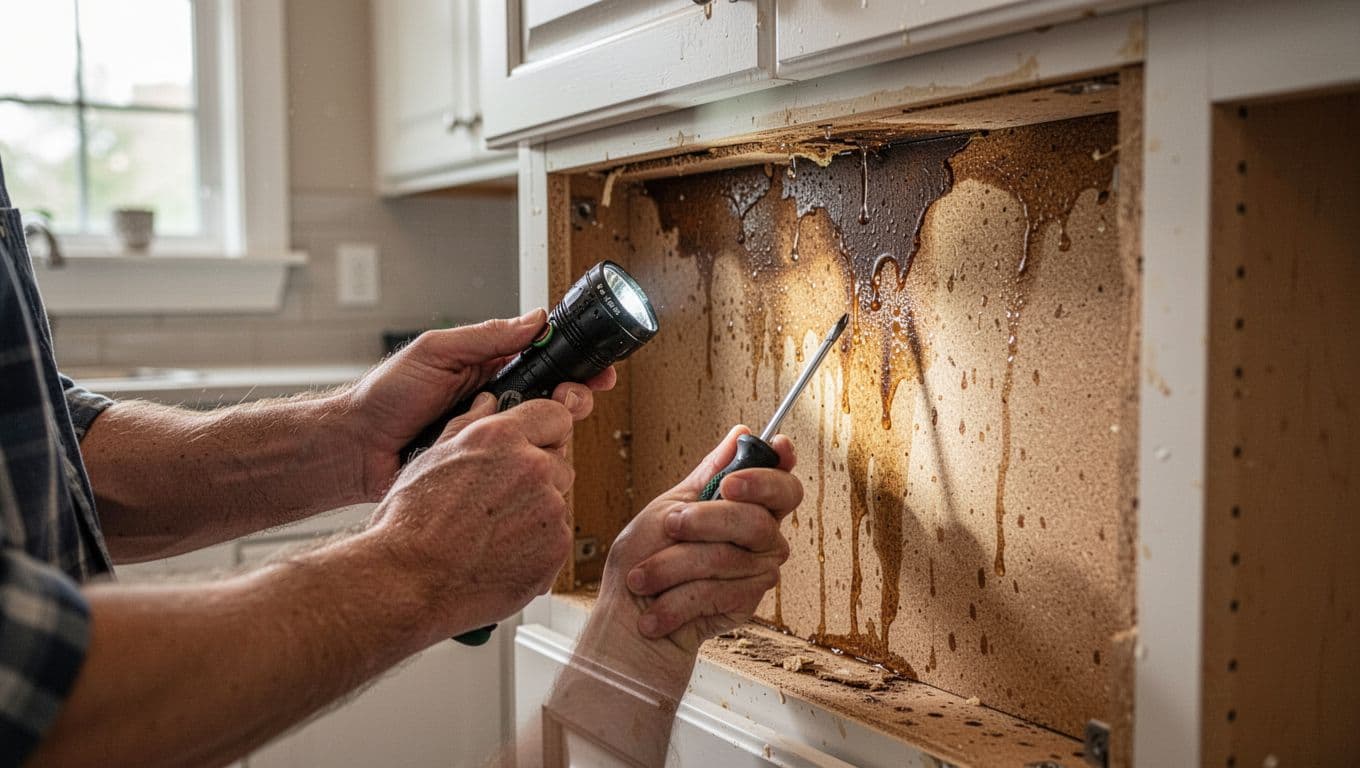
First, make sure the leak is fixed and the area is dry enough to enter safely. Then inspect slowly. Rushing this part is like painting over rot. The surface may look better, but the trouble stays put.
Open every door and drawer. Use a flashlight. Look under the sink, at back corners, under the cabinet bottom, and along seams where panels meet. Those joints often show damage before the face does.
Use this quick checklist as you inspect:
- Press lightly on the cabinet bottom and side panels. They should feel firm, not soft.
- Check the toe kick with your hand or a screwdriver handle. Crumbling edges are a bad sign.
- Look for bubbling, peeling, or swollen spots around seams and near plumbing.
- Smell inside the cabinet. A musty odor often means moisture stayed too long.
- Watch hinges and drawer slides. Loose hardware can mean the material around screws has failed.
- Compare nearby cabinets. If one area feels damp or swollen and the next unit does not, the damage may be localized.
If you have a moisture meter, compare suspect cabinets with dry cabinets across the room. A clear difference suggests moisture is still trapped.
Be careful around mold. Hidden growth often starts behind sink bases, back panels, and wall cavities. Angi’s guide on why mold grows in kitchen cabinets notes that leaks, poor airflow, and condensation are common causes. If you see dark spotting, fuzzy growth, or strong odor, avoid sanding or scrubbing damaged particleboard. That can spread spores and dust.
Wear gloves and an N95 if you must inspect a musty cabinet. However, if mold is widespread or the cabinet material breaks apart in your hand, stop there. At that point, replacement and proper mold cleanup are usually the right path.
Repair vs replace, where the decision usually lands
A short comparison makes the choice easier:
| Cabinet part | Often repairable when | Replace when |
|---|---|---|
| Doors and drawer fronts | Finish is stained, edges have light swelling, shape is still true | They are twisted, split, moldy, or won’t close properly |
| Cabinet boxes | Damage is only cosmetic and the panels stayed solid | Panels are swollen, delaminated, soft, or sagging |
| Toe kicks | One section is swollen but the box behind it is dry | The kick is soft, moldy, or damage runs into the box or floor |
| Surrounding drywall or subfloor | Surfaces are dry and solid | Materials are damp, soft, stained through, or moldy |
The big cost trap is chasing small fixes on a failed cabinet box. Repainting a door or swapping a toe kick is one thing. Rebuilding swollen bases, reattaching loose hardware, treating odor, and drying hidden cavities can stack up fast.
Exact pricing depends on cabinet material, layout, countertop removal, plumbing work, and how many units were hit. Still, broad cabinet repair cost ranges show why minor repairs and full replacement are very different jobs. Repair often makes sense when damage is limited to doors, trim, or one exposed panel. Replacement becomes more sensible when the box is weak, mold-contaminated, or made from water-soaked particleboard or MDF.
Partial replacement can work too. If only the sink base and one neighbor cabinet are damaged, you may not need a full kitchen tear-out. On the other hand, if moisture reached several base cabinets, the wall behind them, or the subfloor below, replacing the affected run is often cleaner and more durable than patching piece by piece.
The strongest rule is simple: judge the cabinet by its skeleton, not its skin. Doors, drawer fronts, and toe kicks may be fixable, but swollen or moldy boxes usually are not.
With water damaged cabinets, replacement is often the smarter move when the core material has puffed up, pulled apart, or started growing mold. A nice-looking door cannot save a cabinet that no longer holds its shape or its screws.